Now that we have the bodice prepped, we can start assembling the blouse. The Romy Wrap features a wrap around yoke, with the finished shoulder seam designed to sit approximately 1" (2.5 cm) forward of the shoulder line.
You will have two back yoke pattern pieces, which will be referred to here as the “outer yoke” and “inner yoke”. The outer yoke will be visible on the exterior of the garment, and the inner yoke will create a nice clean finish on the interior of the garment.
We’ll also be assembling the yoke with a traditional method (not the burrito method). When I was developing this pattern, I tried it with the burrito method and it was just too narrow and resulted in a lot of pulling on the fabric, which made me anxious. So this sequence eliminates the tugging and the result is a clean finish! Anyhow! Let’s get started.
Press the bottom edge of the inner yoke up by 5/8” (1.5 cm)
This will prep the yoke for finishing in a later step.

Attach the outer yoke to the front bodice
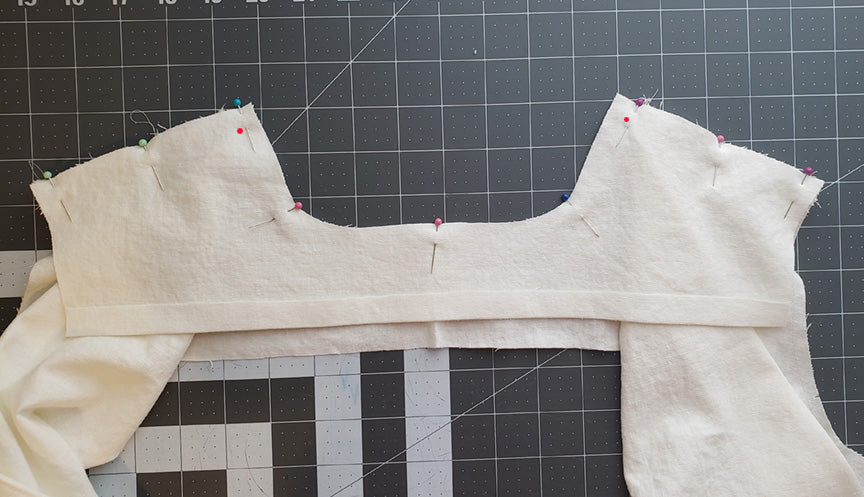
Lay your outer yoke face up, then align the shoulders of the front bodice pieces face down with the yoke shoulder (right sides together). The front bodice shoulders should be justified to the edge of the yoke shoulder, leaving 5/8” (1.5 cm) of yoke overhang at the neckline/shoulder corner. There is a dot marked on the pattern piece to indicate where to align the wrap edge of the bodice at the shoulder (shown in red on the photo below). This is also where you will pivot when sewing the inner and out er yoke together in a later step.
Sew the shoulders with a 1/2” (~ 1 cm) seam allowance.

Attach the inner yoke to the front bodice and outer yoke
Lay the bodice face down (the outer yoke will be face up underneath and attached to the bodice at the shoulders). Lay the inner yoke face down on top, aligning the shoulder seams to sandwich the bodice pieces between the inner and outer yokes. Also make sure the necklines of both yokes are aligned. Once you have everything pinned in place, make sure the wrap edges of the bodices are tucked out of the way for the next step…

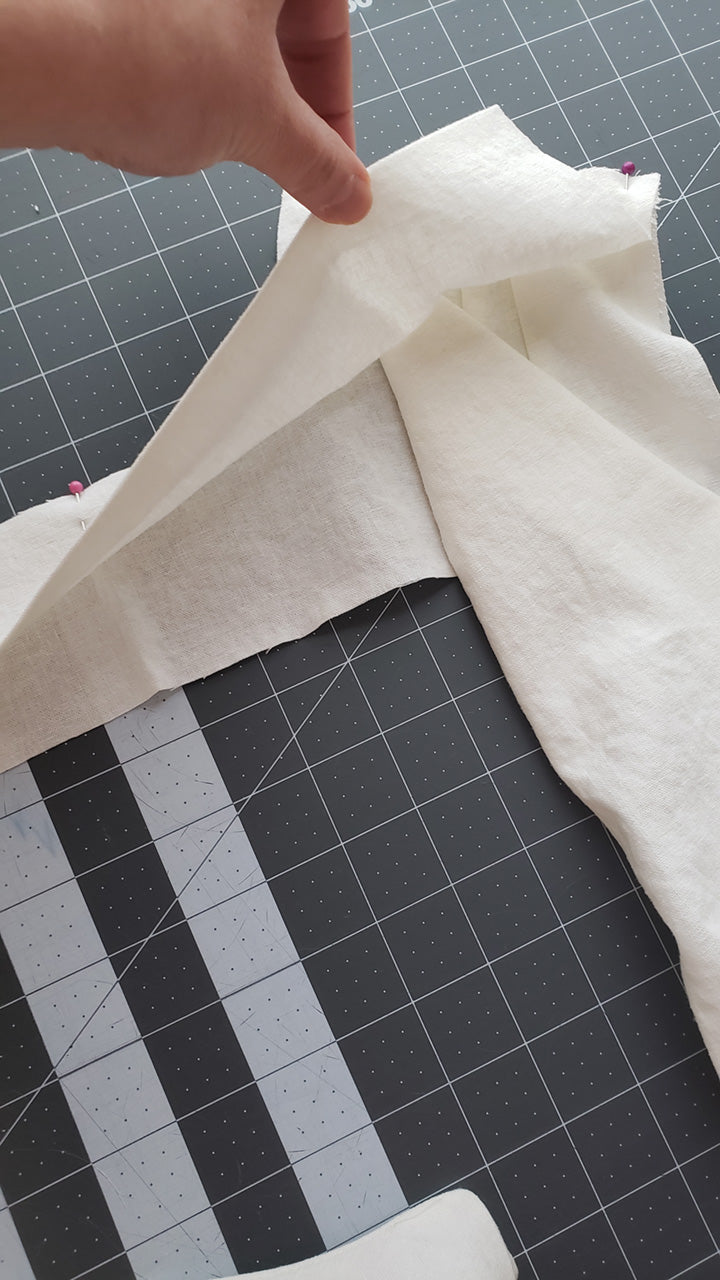
Sew the shoulders together again, this time with a 5/8” (1.5 cm) seam allowance. When you reach the interior corner of the shoulder/neckline where the alignment dot is marked, stop and pivot to continue sewing a 5/8” (1.5 cm) seam around the neckline (make sure the wrap edge of the bodice is out of the way…the bodice should only be sewn to the yoke at the shoulders). When you reach the opposite shoulder, stop and pivot again to sew the opposite shoulder seam.

Grade the seam allowance to about 1/8” (3 mm).

Turn the yokes right side out, pressing them away from the bodice (you may need to clip the seam allowance curves before turning—just don’t clip the seam). Edgestitch around the seam perimeter of the shoulders and neckline.

Attach the back bodice to the outer yoke
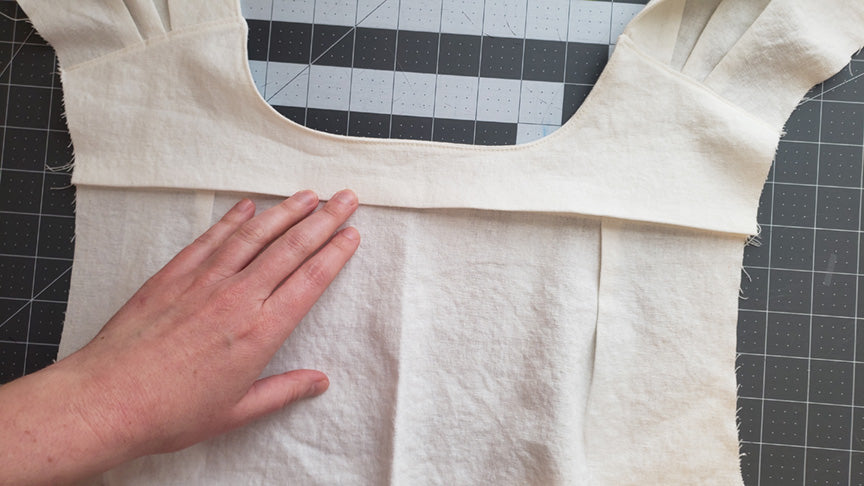
Lay the Yoke/Front Bodice assembly with the Front Bodice right side up. Flip the yoke on the underside down so that it is out of the way and align the straight top edge of the Back Bodice with the straight bottom edge of the yoke on top. Sew the Back Bodice to the yoke along this edge with a 5/8" (1.5 cm) seam allowance. You only want to sew the Back Bodice to the Yoke on top.


After the seam is sewn, grade the seam allowance to 1/4" (6 mm) and press the yoke away from the Back Bodice.

Press the yoke away from the bodice with the seam allowance pressed toward the yoke.

Now lay the bodice assembly face down/wrong side up and flip the inner yoke piece back in place, aligning the fold you pressed earlier with the seam of the Back Bodice/outer yoke.

Carefully pin in place from the exterior side (the unstitched inner yoke will be on the interior), aligning the entire edge neatly. Topstitch the fold down from the exterior side 1/16" (~2 mm) from the seam edge, working slowly to ensure you are catching the folded edge of the inner yoke as you go to close the yoke.


Your garment is starting to take shape!
